

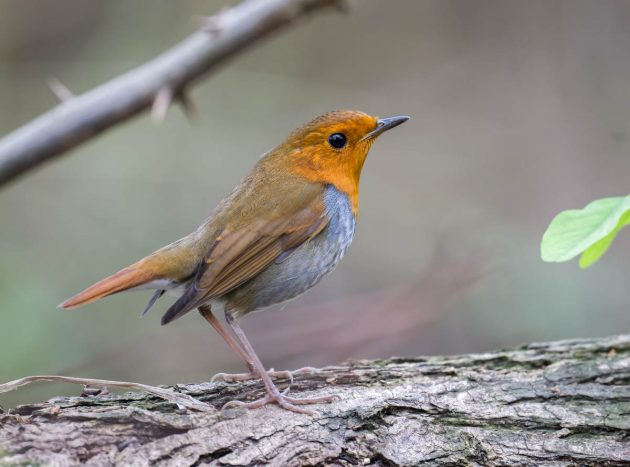
It always surprises me when people compliment my photographs. As I have often commented on this site, I started taking photos of birds only to improve the accuracy of my IDs. And while I put more effort into taking decent photos than I used to, I still don’t do the hard stuff. I don’t greet the dawn in a camouflaged hide, and I don’t lie down on mudflats to see Sandpipers at ground level. I am, in fact, a photographic slacker.
It occurred to me recently that many of the readers of 10,000 Birds might be like me… self-taught bird photographers, who would like to take enjoyable photos, but do not have the time or commitment necessary to take professional- or competition-level wildlife pictures. So, while I am NOBODY to give serious tips on photography, I will dare to give some suggestions for how to achieve my level of slacker success:
- It’s gonna cost you: Yes, you will have to spend some real money to get decent photos from almost anywhere except your birdbath or feeder. I use a Canon Rebel t3I digital camera; equivalent newer (and better) models usually cost well over $500 USD. Professional photographers spend much, much more. Fortunately, the only expense after the initial purchas is maintenance — not like the bad old days of having to pay to get each photo developed!
- Size matters: The above camera came in a package with two lenses, one 18-55 mm and another 75-300 mm. I tried to use the longer lens for birding; I really did. But in the end, I found I had to purchase a 150-600 mm lens. My first time out with it, I took the following picture of a White-crowned Sparrow. What a difference! (And I have definitely improved since then.)
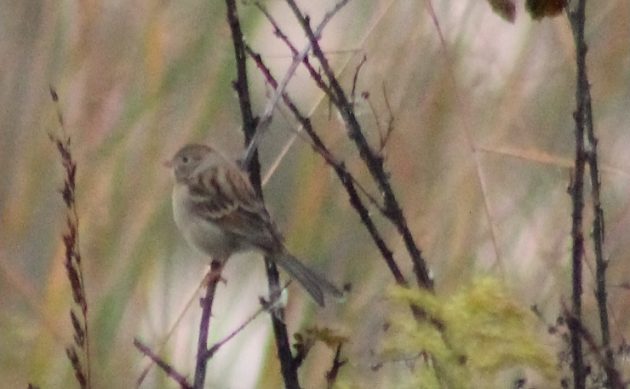
This Field Sparrow (lifer!) was my best photo from the day before the 150-600 mm lens arrived.
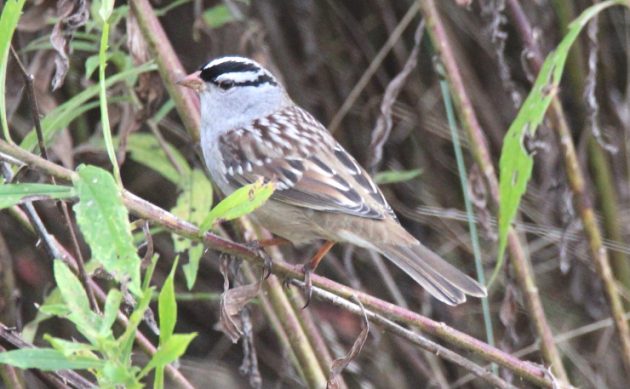
And this photo was from my maiden voyage with the big lens. What a difference!
If you buy a Canon or Nikon lens of that size, you may need to mortgage your home. I’m very happy with my Canon-compatible Tamron lens (Sigma is the other common option), and it cost less than half as much.
- The RAW truth: I don’t even know how NOT to do this… But you must make sure you take your photos in RAW format. If they are stored in JPG. format, they are already compressed, which takes up less memory space, but severely limits your ability to improve the image in post-processing. And we slacker photographers often need to do a LOT of post-processing. (I’ll talk more about that next week.)
- Manual labor: Your camera will probably be filled with options to let the camera determine everything for you for each shot (light levels, depth of field, focus area, etc.). These are tempting, and lots of my birder friends say they do that. But I always keep my camera in the “M” (manual) mode while birding. That way, I can choose my own default settings, and still change them whenever necessary. My following points will explain why this is so helpful.
- Shutter speed: Your digital camera should have an easy option to adjust shutter speed. (Mine is a little wheel behind the shutter button.) Your shutter speed should be lower in darker conditions, and quite high in bright light. I tend to use 400 in deep woods, 800 in the morning or cloudy conditions, and at least 1250 in bright light. You need to go at least that fast if you want to photograph birds in flight, or to freeze hummingbird wings in your image.
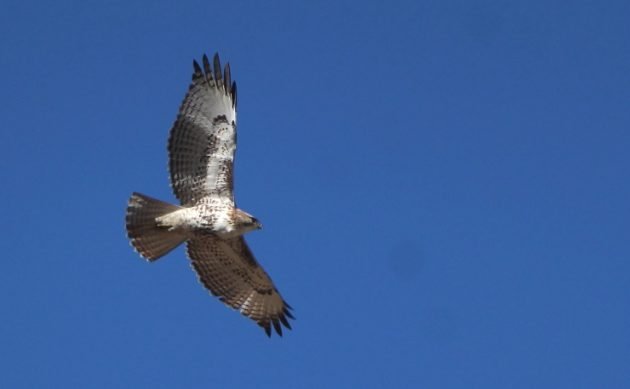
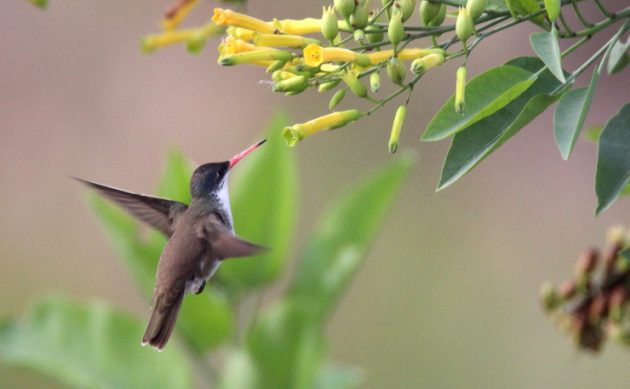
A high shutter speed is your friend! (Red-tailed Hawk and Violet-crowned Hummingbird.)
- The fastest draw in the west: This is probably where I am most unlike many of my birder friends. I love to use the continuous-shoot mode. The camera goes click-click-click-click-click, and more often than not, one of the resulting photos is a winner. When I’m done, I have to wade through a lot of photos. But often, that is part of the fun.
- Focus, focus, focus: Your camera will probably choose to automatically focus on a large area. You need to learn how to change that setting to focus only on the center point. Once you have done this, don’t ever change that setting. This will increase the probability that the camera will focus on the bird, and not on nearby branches.
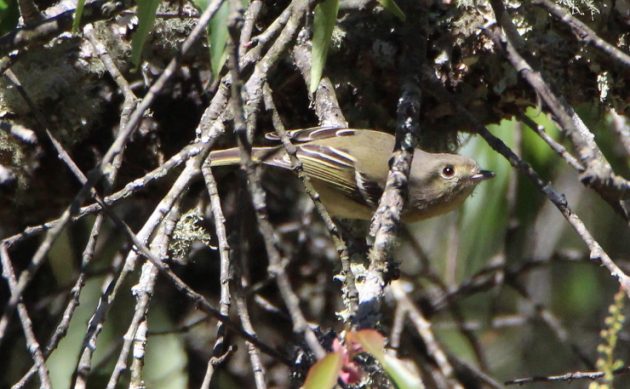
As it did with this Hutton’s Vireo.
- Doing it the hard way: When it works, which is most of the time, I LOVE using autofocus. But sometimes you need an ID photo for a bird that just will not move into the foreground, and the camera will automatically focus on whatever branches are between you and your target. So you must learn to switch off the automatic focus option, and adjust the focus manually. If you are like me, you will almost never get the focus just right. And the bird is likely to fly away while you are focusing. But you might just get an ID you couldn’t achieve any other way.
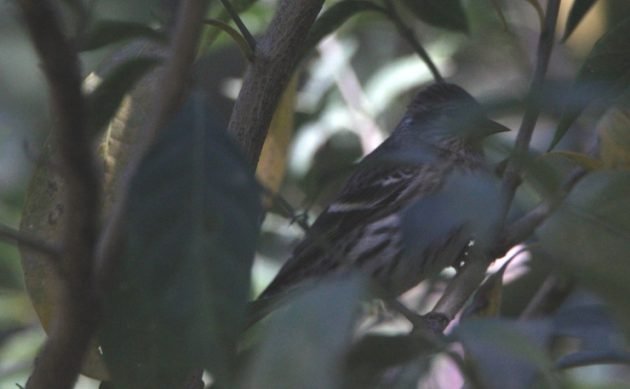
Yes, this was a terrible picture. But it confirmed a Pine Siskin, so it was worth it.
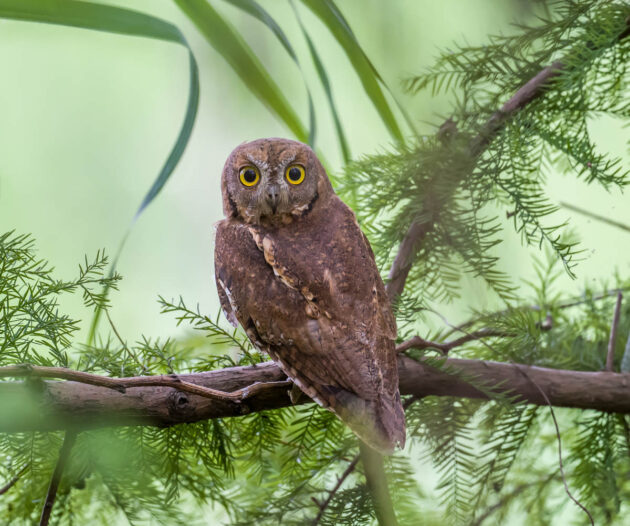
- I’m a very shallow person: Your camera will give you the option to adjust the depth of field on your photos (known as AV: aperture value). A low AV will include items in the foreground and background with relative clarity. But when you raise the AV as high as possible, making your depth of field very shallow, something magical happens: the bird stays focused, but the background melts into a lovely impressionistic pattern of colors. Your birds will pop!
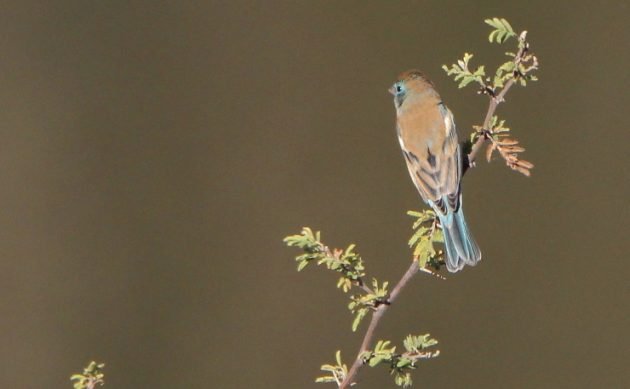

This is what a shallow depth of field gives you. (Lazuli Bunting and Blue Grosbeak)
- Let the sunshine in: ISO is the measurement of how much light your camera lets in when you take a picture. (I know, I probably am explaining this all wrong. What can I say, I’m a slacker.) I usually let my ISO setting on AUTO, or automatic, when I start to shoot. But here is the problem: birds usually appear as a dark form against a lighter background, such as when they are backlit (the sun is behind them), or they are on a branch overhead with the bright sky above them. Sometimes, they are the lighter form against a dark background. Either way, the camera is likely to set its ISO level to the background, and the bird itself becomes just a dark or light silhouette. When this happens, take a quick look at the light-level your camera is choosing, and manually adjust to a higher or lower light level, as required. Take one photo, check the results on your screen, and keep on adjusting until you get optimal results. (Or until the bird flies away while you adjust, which is always a very real risk.)
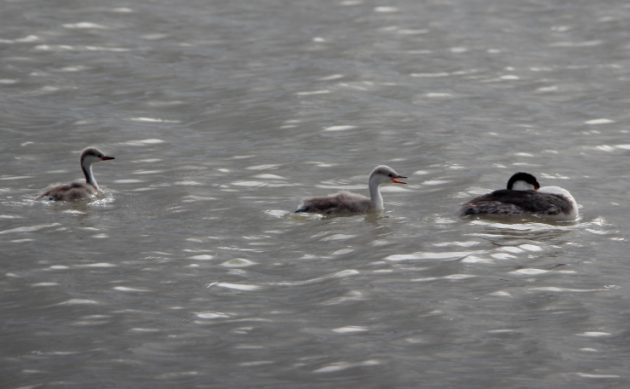
Photography on bright water requires a lot of ISO manipulation. (Clark’s Grebes)
Having said this, I should note that what looks good on my camera’s viewfinder is always darker than the photo will look at home. So I usually try to set my light level a bit dark — unless I want a brighter image so I can ID the bird in the field.
- Flash in the pan: Flash photography freaks out birds. Don’t do it! So that’s one less thing to worry about.
There. These are some of my relatively uninformed recommendations. Next week, I will give some tips for processing your photos when you get home. That’s where the magic happens, for slacker photographers like me.
I will be happy to receive your opinions, additional recommendations, and corrections in the comments below. If I am lucky, I will learn some new things as well.

 New writers welcome – please contact us for details.

We recently moved to a house on a lake. With that has come a few bald eagles in the yard along with osprey, herons and all the ducks and cormorants you would want. The wife had me get a new lens, the 150-600mm, Sigma. I have to spend a lot of time getting used to it but it seems to be a wonderful lens. Thanks for sharing your tips.
Loved having breakfast with you for so many years at Saki’s The two mom’s and us we were a teamDeb and Dan